In order for your drill press to work properly, you need to be able to install a chuck on the drill press. Here’s the thing. You don’t just want to install the chuck and call it good. You’ve got to make sure you properly install the chuck.
A few minor details in the process could make all of the difference in getting your drill press chuck properly installed. If you get the chuck installed properly, this will increase your accuracy and help you get your work done faster.
Table of Contents
The Purpose of a Drill Press Chuck
To understand the importance of a chuck being installed properly, it’s probably best to start with understanding the purpose of the drill chuck.
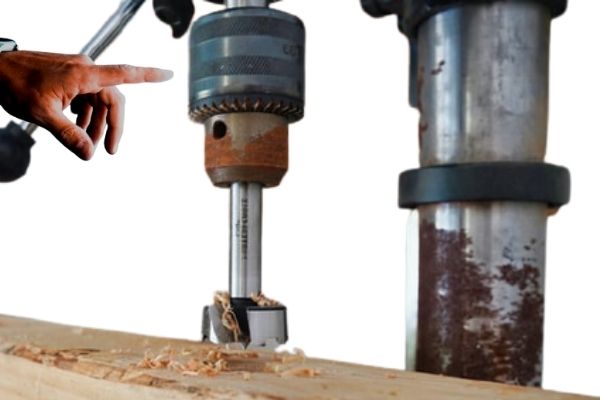
The chuck is designed to go around the shank of your drill press. This is ultimately where the drill bit is going to attach and flow through. It holds the shank of the drill bit securely in place so that you can insert your shank and get to work.
A chuck on a drill press might come in different sizes but they all have a maximum size of a bit that they can host and then they adjust for other sizes too most of the time.
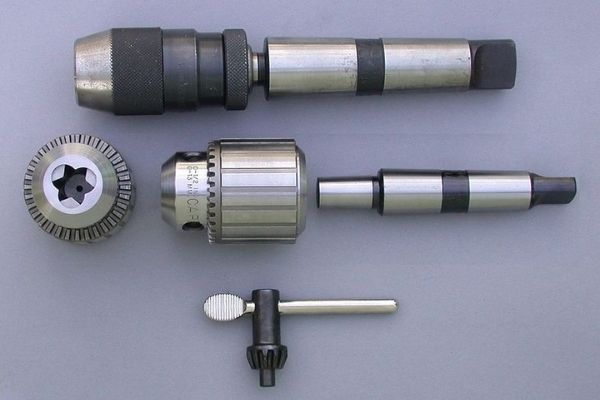
When you make adjustments to your chuck to host a bit, you do so with the chuck key, which is a special wrench for just this purpose.
You will need to clean and maintain the chuck but there are times you may have to remove it or even replace it as well.
The Steps to Install a Chuck on a Drill Press

Installing the chuck is really pretty simple if you know what you are doing. There are some specific steps to follow to make sure you get it installed properly.
You want to make sure you have proper alignment and installation. If your chuck is off or not installed properly, this could affect the accuracy of your drilling processes.
Follow these detailed steps.
1. Clean and Lubricate Chuck
If you are replacing a chuck, you need to first remove the chuck that is in place. If you’re installing a chuck new and you don’t need to remove a chuck first, you can skip to the 3rd step here in our process. These first two steps are all about removing a chuck that is already in place.
Start by powering off the drill press and then unplugging it from the power source as well. This is for safety purposes so that the drill press doesn’t accidentally get powered on or anything while you’re handling the various pieces.
Remove the bit from the chuck if you have one in place. Use the chuck key to open up the chuck and loosen the collar as much as you can.
Once you’ve loosened the collar, you need to clean up the chuck.
Use a lint-free cloth to wipe the chuck down thoroughly. If there is any sawdust in the chuck, be sure to blow it out. If you use compressed air, this should clean any dust or other loose grime in the chuck.
Once you’ve cleaned the chuck, it will need to be lubricated to remove it.
Just grab your favorite drying lubricant and spray it into the jaws of the chuck. Work the lubricant throughout the jaws by extending and retracting them a few times. If you have excess lubricant, simply wipe it off.
2. Chuck Removal
Once you’ve cleaned and lubricated the chuck, you need to then remove the chuck. For removal, you will need your chuck screw.
But before you remove the chuck, you’ve got to lower the quill mechanism.
You should be able to press the handle of your drill press and lower down the quill. Lower it as much as you possibly can and then rotate it to lock it down. A vertical slot that you can insert the key in should show now.
Insert your chuck key into that slot and then use a small mallet to help knock the chuck loose from your spindle. This should loosen it so it can just come right off.
3. Prepare Chuck for Installation
Before you install your chuck, you need to prep it. This means cleaning the chuck. You might have cleaned it in step 1 above but it may need a bit more cleaning after it has been removed.
If you skipped step 1 then now is the time to clean the chuck before you install it. Again, just wipe it down well with a lint-free cloth and then use compressed air to blow any dust or grime out of the crevices.
4. Installation
Now, you can install your chuck onto the drill press so that you can get to work! Follow these steps.
- Raise your quill as high as it will go to move your spindle out of the way. Lock the quill in place.
- If you can, title or move the drill press table out of your way so you have clear access and vision.
- Slide the tapered shank of your chuck into the spindle of the quill.
- Rotate the chuck just slightly to fit it within the spindle.
- Retract the chuck jaws completely.
- Use a small mallet to hit the bottom of the chuck. You should just need one good hit to help shift the chuck into place in the spindle.
- Once placed and seated, you can rotate the chuck to be sure it is operating properly. You might also follow up with a few test drills before getting to work.
The hardest part of the whole process is making sure the chuck is cleaned properly and then getting it lined up and seated into place. When you use the mallet to seat it, you don’t want to bang on it like a hammer.
It’s best if you can just get one good little hit on the chuck to seat it. If you have to hit it over and over, this could actually damage or jam your chuck and lead to other issues that you probably don’t really want to deal with.
How Does a Drill Chuck Hold on a Machine?
The drill chuck is held on by the spindle beneath the quill. This is why you have to move the quill and then attach or detach from the spindle in order to get your drill chuck placed.
The chuck has a tapered end that turns and connects into the spindle when the quill is fully retracted for access. You simply need to line up the chuck, turn it in that little hole, and then use your mallet to knock it in securely.
Conclusion
We hope that this guide to installing a chuck on a drill press is helpful for you. Removing and installing a chuck is supposed to be straightforward, although sometimes it is more challenging than it sounds.
If you follow these tips and steps, you should have no problems installing your chuck on the drill press. Don’t forget to run a few test drills and holes to be sure everything is lined up before you put that chuck to work and end up with errors. It’s better to test it just in case.